How to Sign Up for Subnet24
Last updated
All documentation
This guide will walk you through the simple process of creating a new Subnet24 account to access subnet scanning capabilities.
Creating Your Account
Step 1: Access the Sign-Up Page
- Open your web browser and navigate to https://app.subnet24.com
- On the login screen, click the “Sign Up” tab
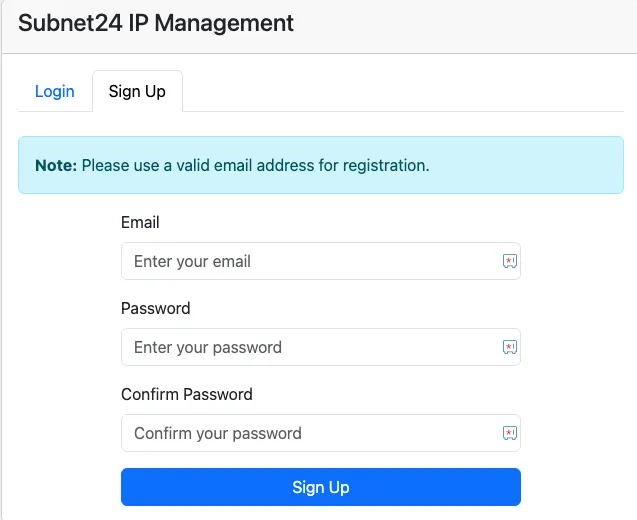
Step 2: Enter Your Information
Complete the sign-up form with the following information:
- Email Address: Enter a valid email address that you have access to
- Password: Create a secure password for your account
- Confirm Password: Re-enter your password to confirm
Step 3: Complete Registration
Click the “Sign Up” button to submit your information and create your account.
Free Plan Access
After signing up, you’ll automatically be enrolled in the Free Plan, which includes:
- Basic subnet scanning capabilities
- Access to the Subnet24 dashboard
- 2 /24 or greater Subnets
Upgrading Your Plan
You can upgrade your account at any time to access premium features:
- Log in to your account at https://app.subnet24.com
- Navigate to the “Settings” section
- Select “Account Info” then “Upgrade Account”
- Choose your preferred plan and follow the payment instructions
Next Steps
Once your account is created, you’re ready to:
- Set up your first groups
- Set up your first subnet
- Begin tracking your IP Addresses
For assistance with account creation or subscription questions, please contact support@subnet24.com